

- A project in the Phylax platform
- A release created with
pcl apply - Access to review that project’s releases
What backtesting checks
Backtesting is included in the platform’s pre-release checks. When you create a release and open it for review, the platform tests every assertion in the release against transactions from the last 20,000 blocks. The results identify historical transactions that would have been prevented from settling if the current assertion set had been active. Use these findings to measure how an assertion behaves against real protocol activity before you deploy it. This is especially important for probabilistic or threshold-based protections, such as outflow circuit breakers and anomaly detection, where a threshold that is too restrictive can block benign behavior and one that is too permissive can miss harmful behavior.Open the release
In the platform, open your project, select Releases, and choose the release you want to review. The release overview shows the proposed assertion changes and three pre-release checks: assertion verification, source code, and backtesting. See Release Review Checks for the fields and purpose of each check. Review the release diff first so you know which contracts and assertions are included. Then check the status beside Backtesting. A passed check means the backtest found no historical transaction that the release would have invalidated. Issue found means at least one transaction needs your review.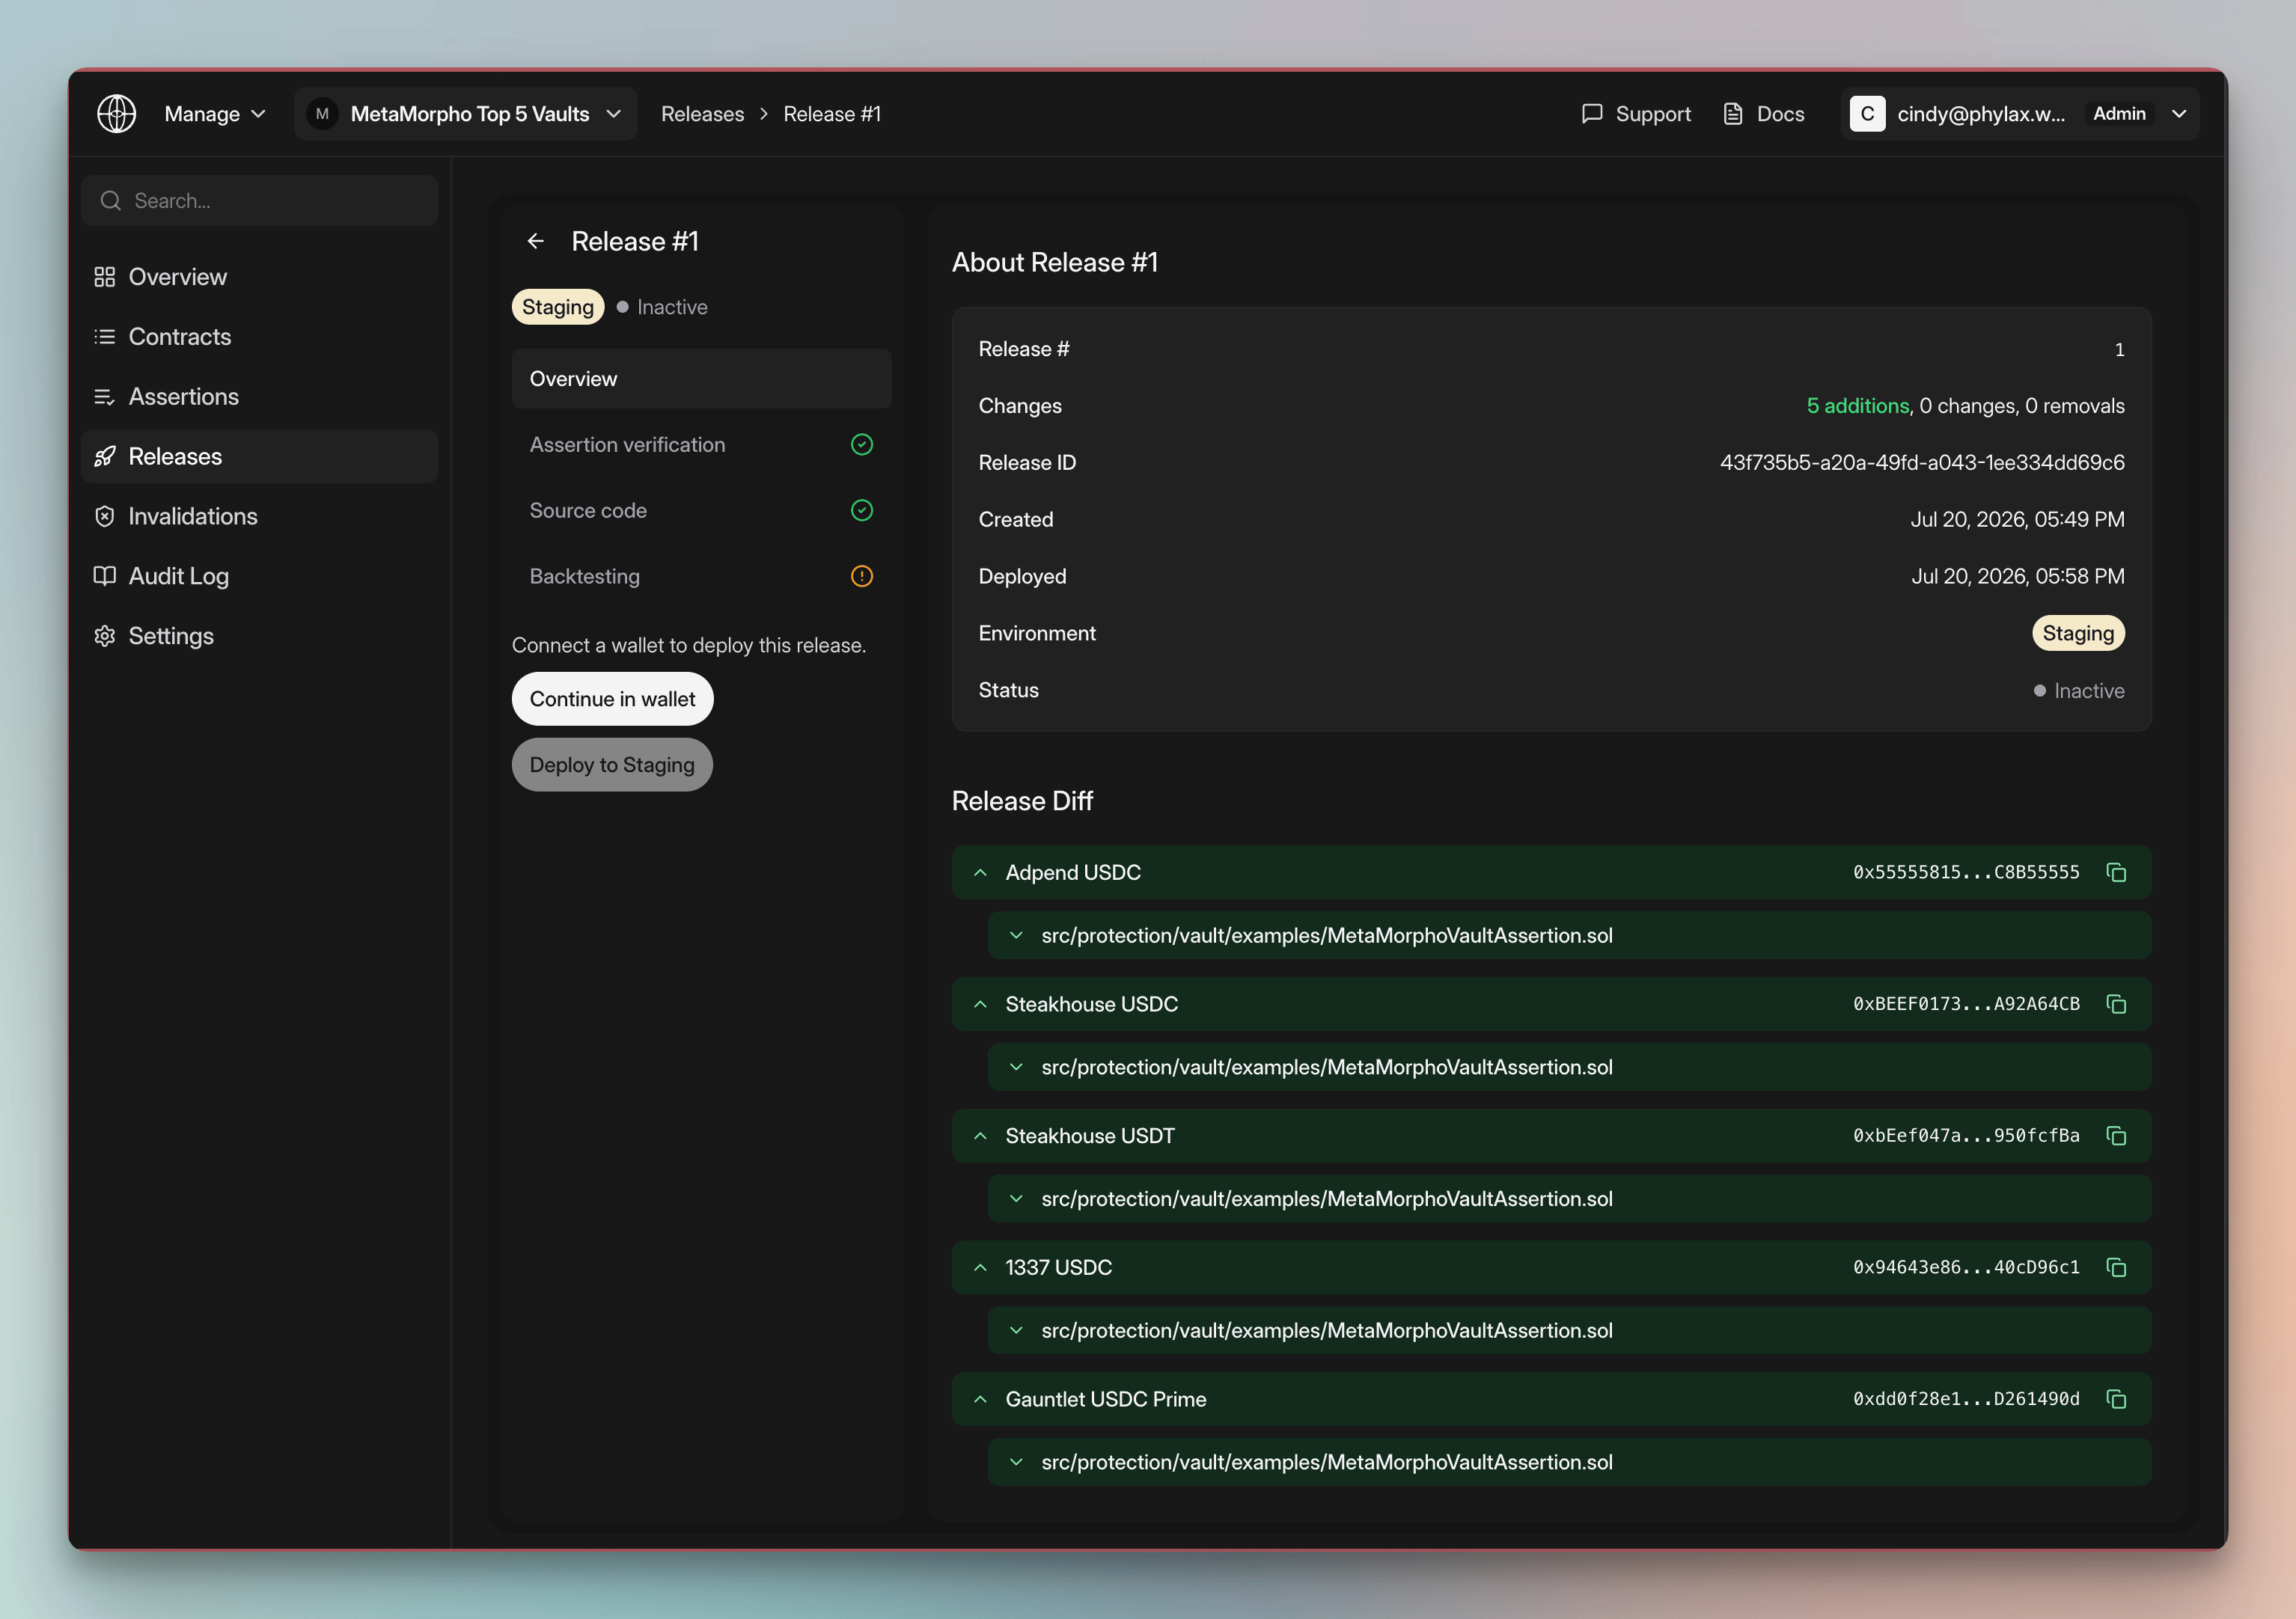
Review the release diff and the status of each pre-release check
Review a backtesting finding
Select Backtesting to open the complete result. The summary shows the tested block range and whether the assertions invalidated any historical transactions. When the backtest finds an invalidation, the result identifies the matched transaction hash, assertion ID, block number, assertion adopter, and all assertion IDs watched during the replay. Start with the Matched TX Hash, Matched Assertion ID, and Matched Assertion Adopter. Together, these fields tell you which transaction was rejected, which assertion failed, and which protected contract it was evaluating. The attempt history records when the check ran, while Transactions With Assertions shows how many transactions in the range exercised the assertion set.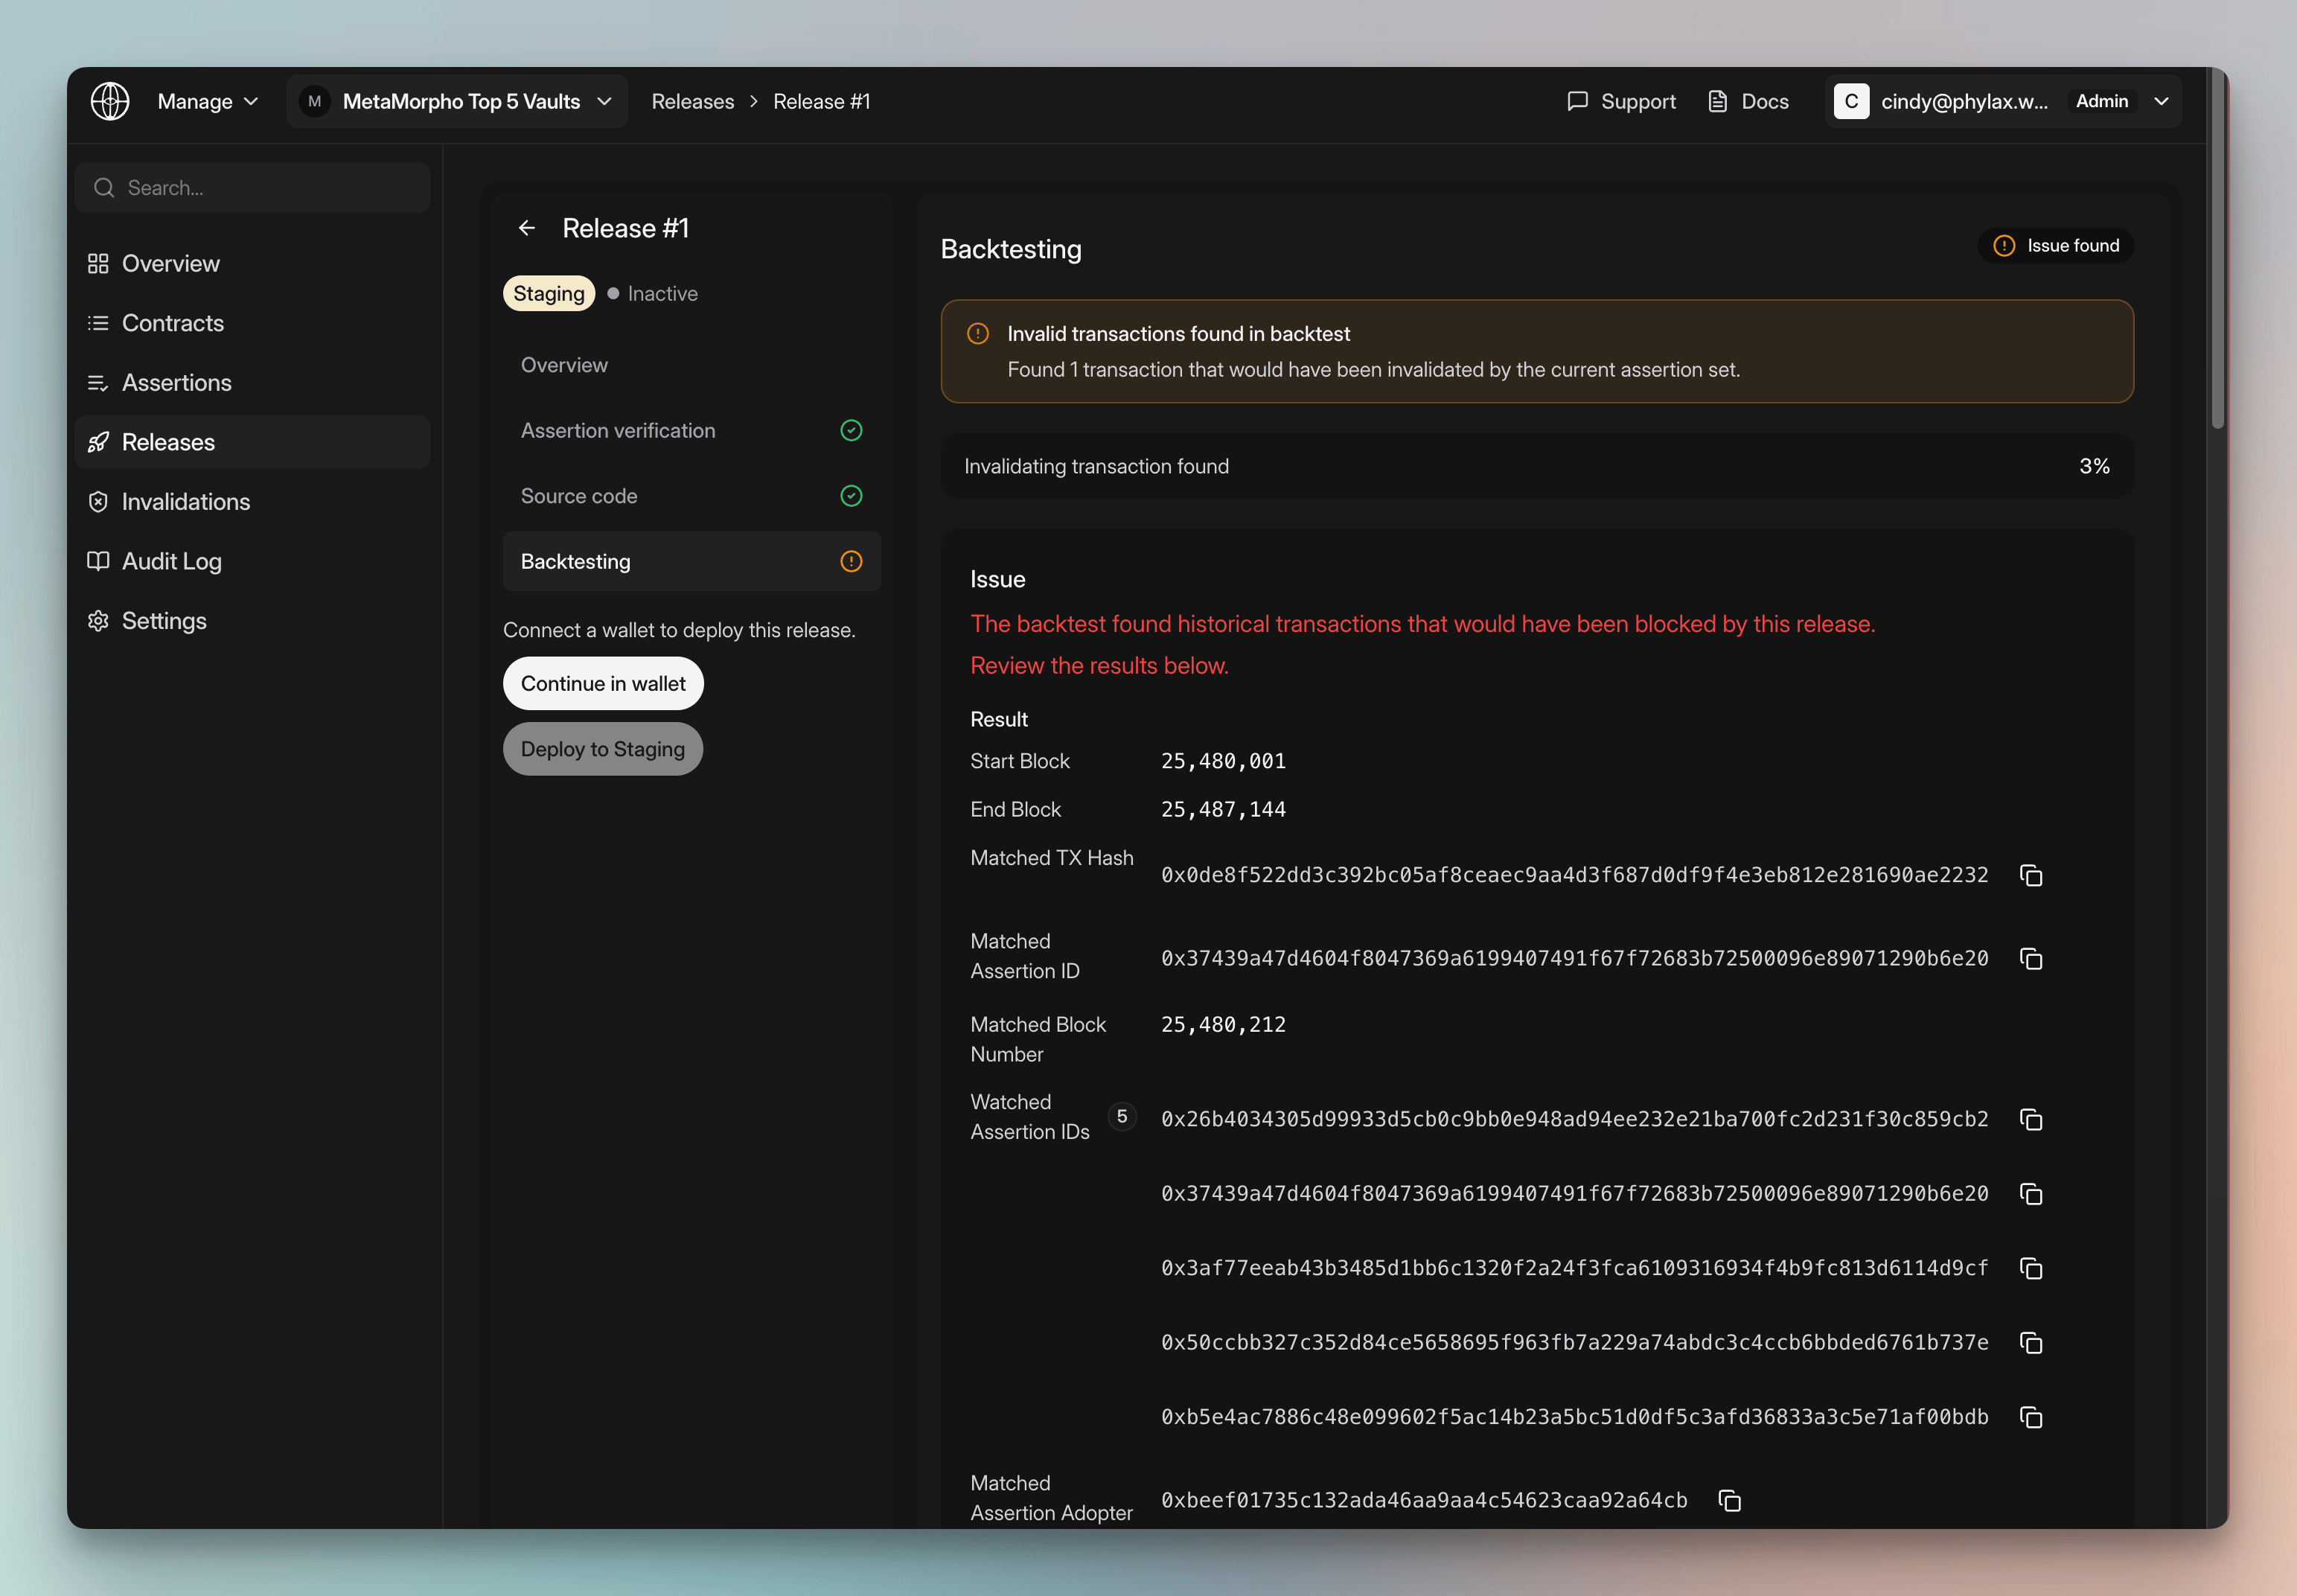
A backtesting finding with the matched transaction, assertion, block, and adopter
Inspect the invalidated transaction
Copy the Matched TX Hash and paste it into the block explorer for the project’s network. Review the sender and recipient, decoded function call, calldata, transferred value, token transfers, event logs, and internal calls. Compare that activity with the assertion’s intended invariant and the matched adopter address. The goal is to explain why the assertion would have rejected a transaction that previously settled: the transaction might contain behavior you want to prevent, or it might reveal a legitimate protocol operation that the assertion does not yet handle. Next, inspect the Matched Incident Payload in the backtesting result. The failure entry maps the revert data to the assertion function, assertion ID, and adopter address. For assertions that depend on cumulative flows, an outflow window, or anomaly-detection context, also expand the previous transactions and review the block environment. The matched transaction alone may look benign even though the preceding activity caused the assertion’s threshold or model to fire.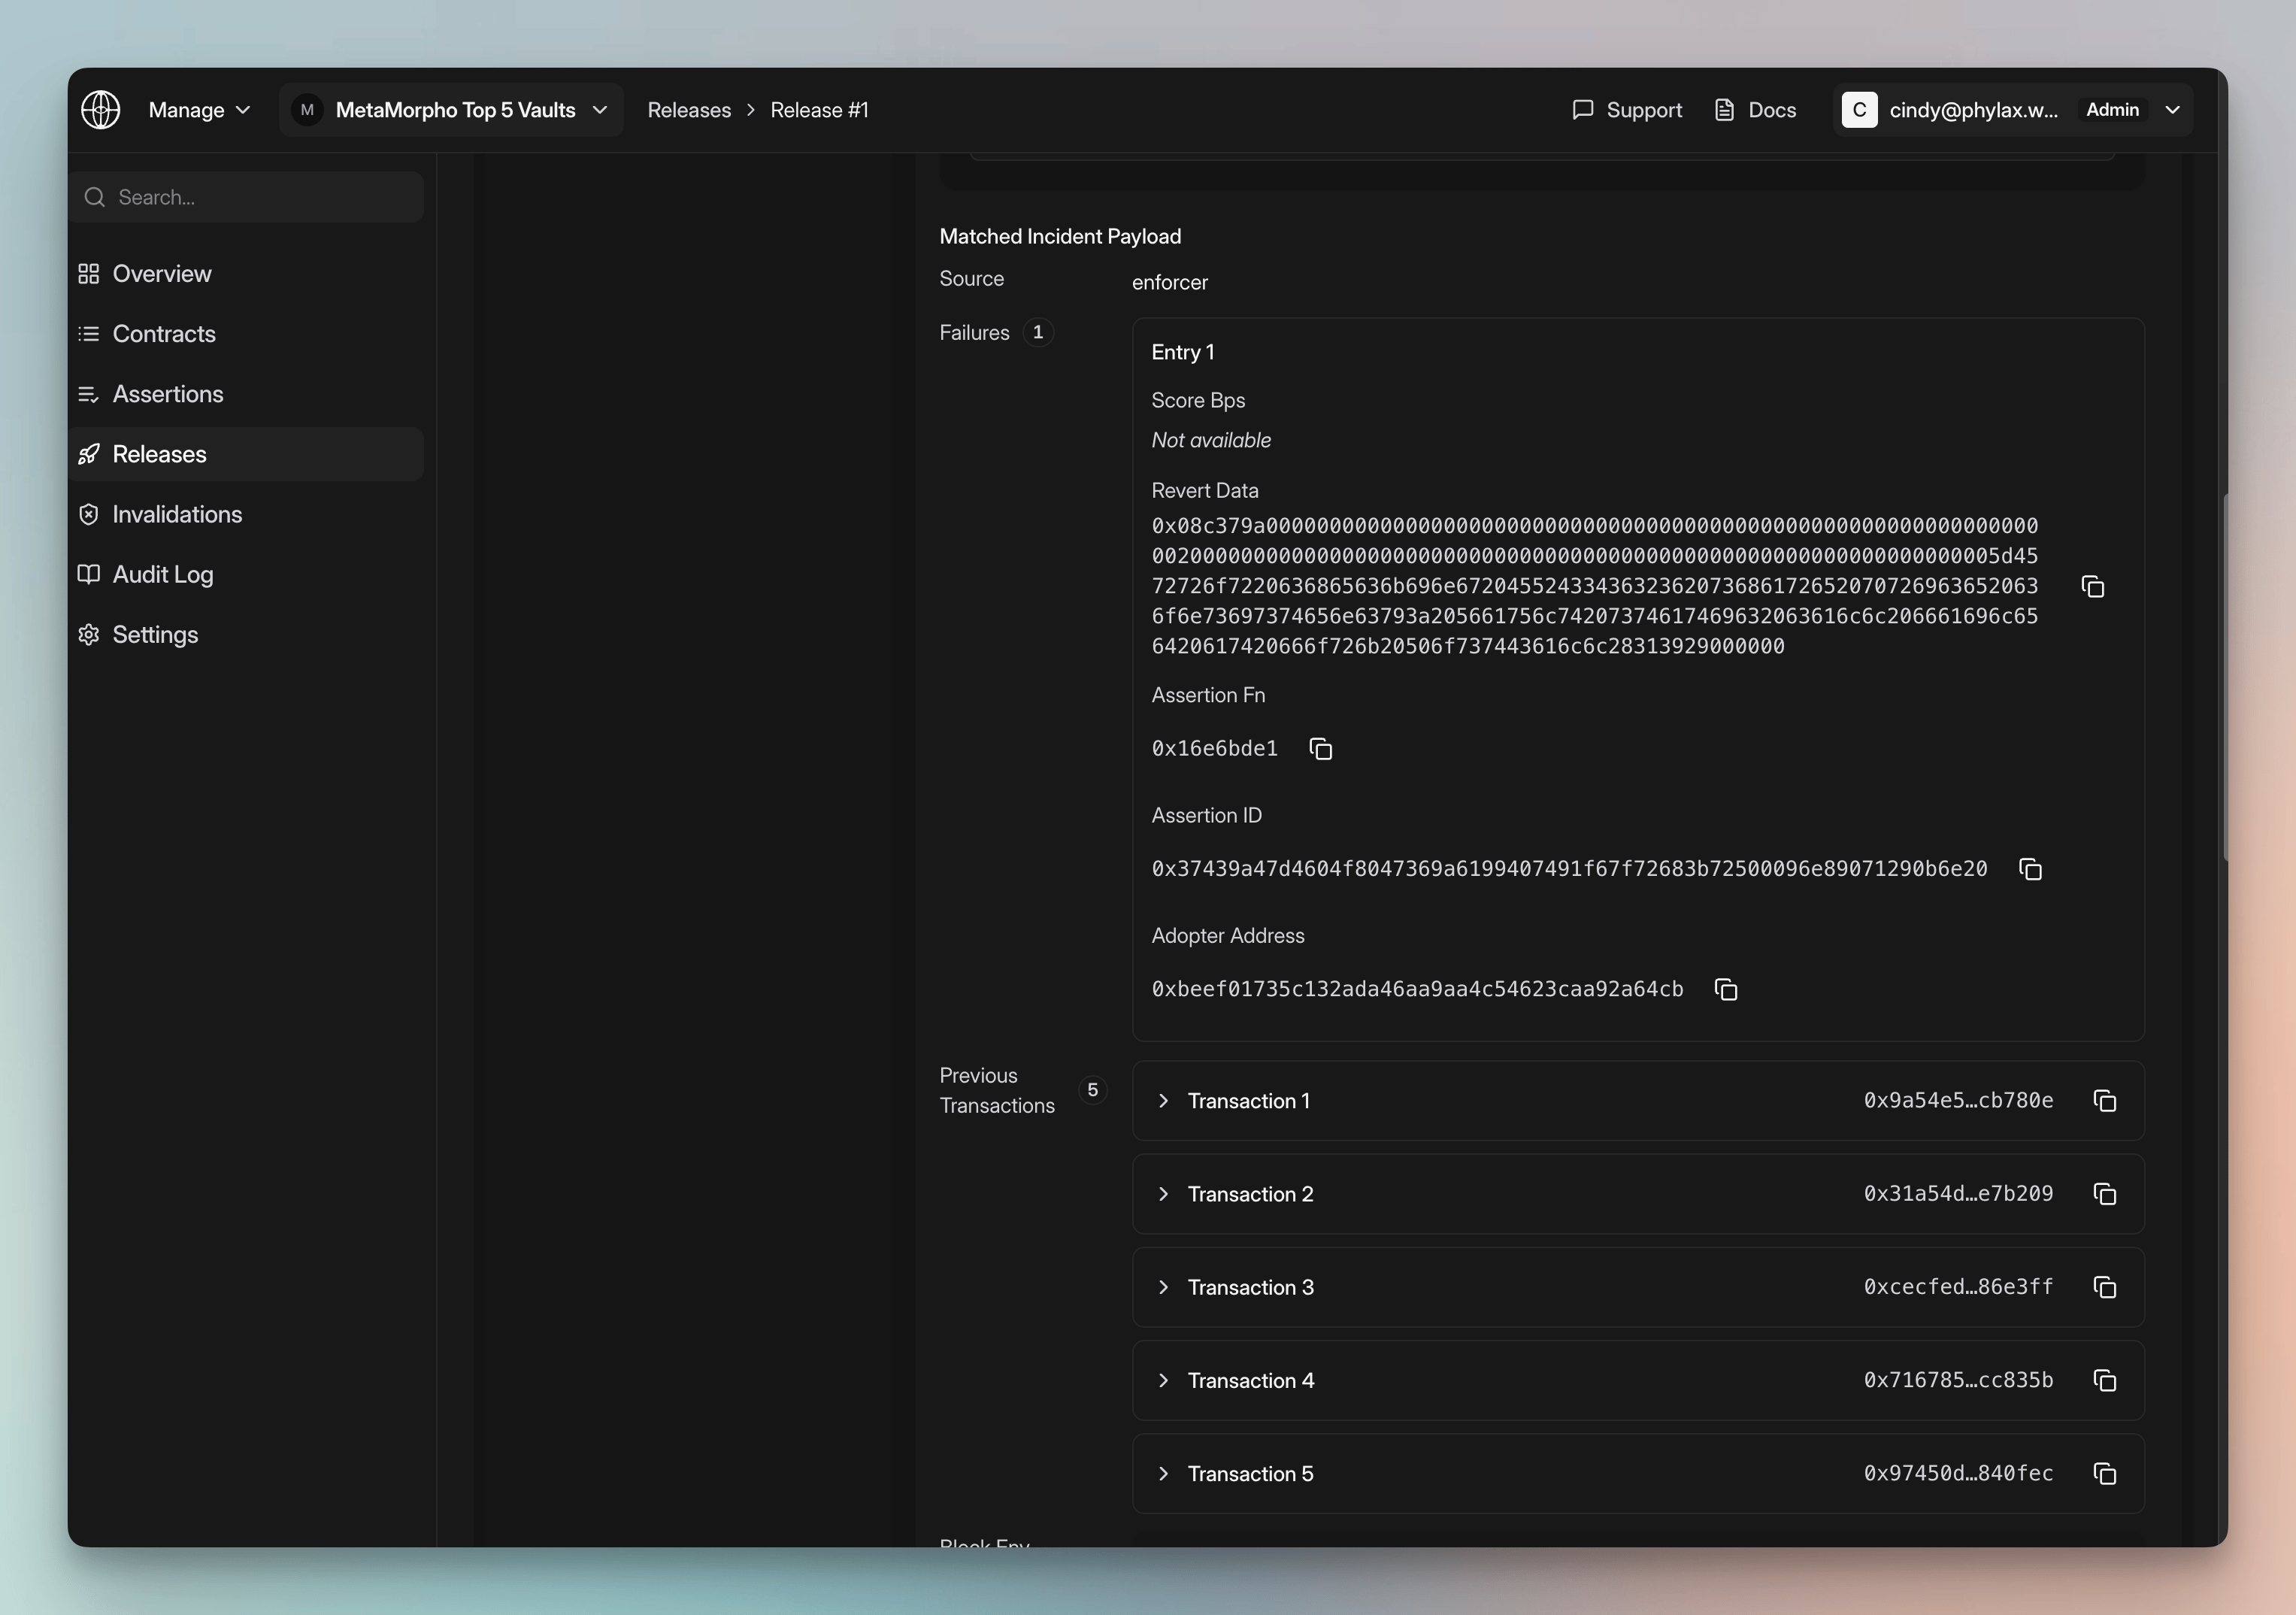
Use the incident payload and preceding transactions to understand why the assertion failed
Decide what to do next
If the matched transaction represents behavior the assertion is intended to prevent, record why the finding is expected and continue reviewing the other release checks. A historical match can be useful evidence that the assertion detects the targeted behavior, but it does not prove that the assertion covers every harmful transaction. If the matched transaction is benign, treat it as a false positive. Adjust the assertion’s thresholds, trigger scope, time window, or handling of normal protocol operations, then add the transaction as a regression case in your assertion tests. Create a new release withpcl apply; the platform will run the pre-release checks and backtest the updated assertion set again.
If the matched transaction and assertion metadata do not explain the finding, inspect the Matched Incident Payload and expand the previous transactions. Decode the revert data, review the block environment, and confirm that the assertion ran against the intended adopter and state. Do not deploy the release until you can explain the finding from the transaction, assertion, and platform evidence. See Troubleshooting for common assertion failures.
When the backtest passes, finish reviewing assertion verification and source code, then deploy the release to staging. Continue monitoring staging invalidations before promoting the assertion to production. A passing backtest confirms that the tested historical activity did not trigger the release; it is not a substitute for focused tests, known-exploit coverage, or staging observation.
Next steps
Test Assertions
Add focused and regression tests before creating another release
Apply Assertions
Create a new release after tuning an assertion
Deploy with the Platform
Deploy a reviewed release to staging
Release Review Checks
Review assertion verification, source code, and backtesting